アプリの実装
テンプレートアプリから作成したサンプルアプリの実装を通して、Personiumの主要なAPIを説明します。サンプルアプリのコードは以下にあります。
本ドキュメントのサンプルアプリで使用するCellのURLは以下の表の通りとなります。
| Cell種類 | URL |
|---|---|
| データ主体Cell | https://alice.example/ |
| アプリCell | https://app-personium-trails.example/ |
本ドキュメントではHTTP通信を必要部分のみ記載し、見やすさのために改行などを加えた簡略的な表記で表します。
OAuth 2.0 認可コードフロー
Personiumを使ってOAuth 2.0 認可コードフローを取る場合、以下のエンジンスクリプト[1]とPersonium APIを使用します。
- エンジンスクリプト
- Personium Cell Level API
詳細のシーケンス図はこちらを参照してください。
サンプルアプリを起動するとき、HTMLを返すエンジンスクリプトhttps://app-personium-trails.example/__/front/appにWebブラウザでアクセスします。すると以下の画面が表示され、データ操作連携を行うユーザ自身のCell URLの入力が求められます。
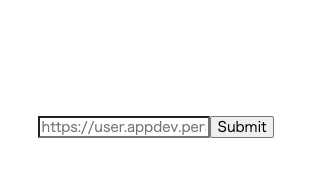
ユーザ自身のCell URLhttps://alice.example/を入力するとFetchによる非同期通信で以下のエンジンスクリプトのstart_oauth2にアクセスします。
# リクエスト
POST https://app-personium-trails.example/__/auth/start_oauth2

cellUrl=https://alice.example/

# レスポンス
Status Code: 303
Location: https://alice.example/__authz
?response_type=code
&client_id=https://app-personium-trails.example/
&redirect_uri=https://app-personium-trails.example/__/front/app?cellUrl=https://alice.example/
&state=15933********-per
このスクリプトはCSRF対策で使用するstateパラメータをサーバサイド上で生成し、認可エンドポイントにリダイレクトします。パラメータのredirect_uriには認可コードを受け取り、アクセストークン取得を行うアプリのURLを指定します。サンプルアプリではエンジンスクリプトhttps://app-personium-trails.example/__/front/appが最初に受け取るので、このURLを指定します。
リダイレクトするときのOAuth 2.0 認可エンドポイントへのHTTP通信は以下のようになります。
# リクエスト
GET https://alice.example/__authz

response_type=code
client_id=https://app-personium-trails.example/
redirect_uri=https://app-personium-trails.example/__/front/app?cellUrl=https://alice.example/
state=15933********-per

# レスポンス
Status Code: 200
Content-Type: text/html;charset=UTF-8

<認証フォームのHTML>
上記のレスポンスが返ってくるため、認証フォームが表示されます。
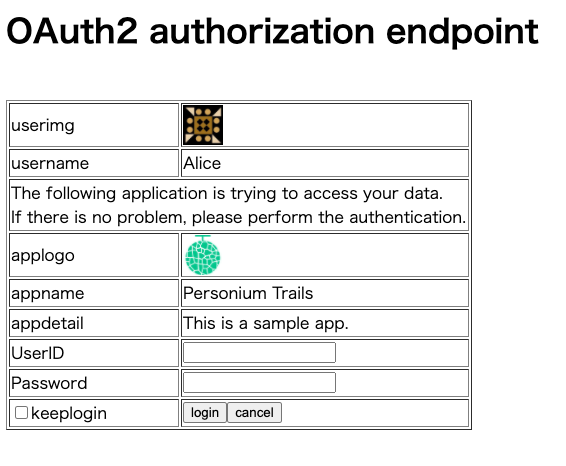
上記の認証フォーム上でUserID, Passwordを入力し、ログインボタンを押すとOAuth2.0 認可エンドポイントにおける POST の受け入れへのHTTP通信は以下のように行われます。
# リクエスト
POST https://alice.example/__authz

response_type=code
client_id=https://app-personium-trails.example/
redirect_uri=https://app-personium-trails.example/__/front/app?cellUrl=https://alice.example/
state=15933********-per
username=me
password=mypassword

# レスポンス
Status Code: 303
Location: https://app-personium-trails.example/__/front/app
?cellUrl=https://alice.example/
&last_authenticated=1592968464695
&code=GC~EPET********-9ws
&failed_count=0
&state=15933********-per
code(認可コード)とstateのパラメータを加えた状態で、元のサンプルアプリを起動するエンジンスクリプトhttps://app-personium-trails.example/__/front/appにリダイレクトします。
# リクエスト
GET https://app-personium-trails.example/__/front/app
?cellUrl=https://alice.example/
&last_authenticated=1592968464695
&code=GC~EPET********-9ws
&failed_count=0
&state=15933********-per

# レスポンス
Status Code: 200
Content-Type: text/html;charset=UTF-8

<サンプルアプリのHTML>
サンプルアプリのHTMLからFetchによる非同期通信でエンジンスクリプトのreceive_redirectにcode(認可コード)とstateを加えた上でHTTP通信を行います。
# リクエスト
POST https://app-personium-trails.example/__/auth/receive_redirect

cellUrl=https://alice.example/
code=GC~EPET********-9ws
failed_count=0
state=15933********-per
エンジンスクリプトのreceive_redirect上の処理で、stateの検証を行った後、PersoniumのOAuth 2.0 トークンエンドポイントにアクセスします。HTTP通信は以下のように行われます。
# リクエスト
POST https://alice.example/__token

grant_type=authorization_code
code=GC~EPET********-9ws
client_id=https://app-personium-trails.example/
client_secret=<アプリCell上で認証したデータ主体Cellへのトランスセルトークン>

# レスポンス
{
  "access_token": "AR~omWD********IPo",
  "refresh_token_expires_in": 86400,
  "refresh_token": "RR~KR9********hbs",
  "p_target": "https://alice.example/",
  "scope": "root",
  "token_type": "Bearer",
  "expires_in": 3600
}
トークンエンドポイントのレスポンスをreceive_redirectでのレスポンスとしてそのまま返します。以降、権限が必要なAPI操作はここで手に入れたaccess_tokenの値をHTTPヘッダAuthorization: Bearer <access_token>として与えて実行します。
Boxインストール
認可が成功するとBoxインストールの画面が表示されます。

Start Installボタンを押すとBoxインストールAPIにアクセスします。
# リクエスト
MKCOL https://alice.example/app-personium-trails

(app-personium-trailsのbarファイル)

# レスポンス
Status Code: 202
Boxインストールの進行状況はBoxメタデータ取得APIにアクセスすることで確認します。
# リクエスト
GET https://alice.example/app-personium-trails

# レスポンス
Status Code: 200

{
  "cell": {
    "name": "alice",
    "url": "https://alice.example/"
  },
  "box": {
    "schema": "https://app-personium-trails.example/",
    "name": "app-personium-trails",
    "started_at": "2020-06-28T14:30:41.119Z",
    "progress": "25%",
    "url": "https://alice.example/app-personium-trails/",
    "status": "installation in progress"
  },
  "unit": {
    "path_based_cellurl_enabled": false,
    "url": "https://example/"
  }
}
statusの値がreadyになったとき、Boxインストールは完了しています。
Boxインストールが完了した状態で、アクセストークンからBoxのURLを取得する時、BoxURL取得APIにアクセスします。
# リクエスト
GET https://alice.example/__box


# レスポンス
Status Code: 200

{
  "Url": "https://alice.example/app-personium-trails/"
}
Boxインストールが完了すると以下画面が表示されます。
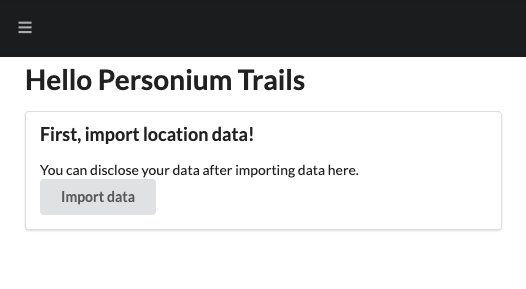
この画面からGoogle Takeoutで手に入れた移動履歴データ(例:2020_MAY.json)をPersonium上に取り込みます。その部分の説明は省略し、それが完了した状態を想定して次の項に進みます。
リレーショナルデータ (OData)
以下の画面では特定の期間でのデータ一覧を取得し、表示しています。
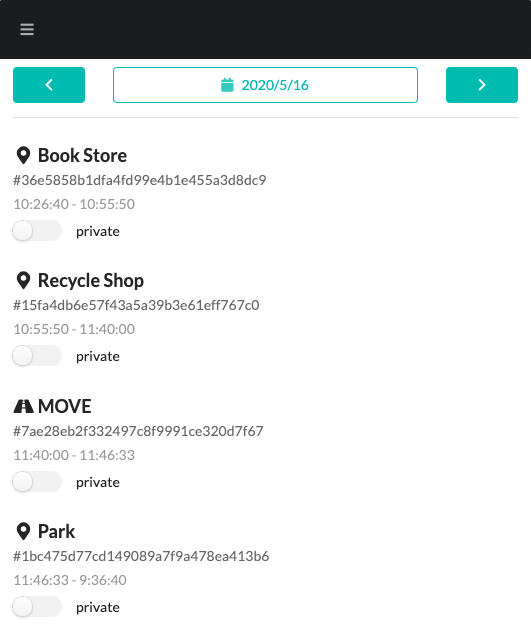
このような検索をさせたいデータにODataは適しています。特定期間の滞在先のデータ一覧を取得するにはODataコレクションのEntity一覧取得APIを使用します。HTTP通信は以下のようになります。
# リクエスト
GET https://alice.example/app-personium-trails/index/Stay
?$filter=startTime ge 1589554800000 and startTime lt 1589641199999
&format=json

# レスポンス
Status Code: 200
{
  "d": {
    "results": [
      {
        "__metadata": {
          "uri": "https://alice.example/app-personium-trails/index/Stay(15fa4db6e57f43a5a39b3e61eff767c0)",
          "etag": "W/\"1-1593356562389\"",
          "type": "UserData.Stay"
        },
        "__id": "15fa4db6e57f43a5a39b3e61eff767c0",
        "__published": "/Date(1593356562389)/",
        "__updated": "/Date(1593356562389)/",
        "endTime": "/Date(1589596800521)/",
        "latitudeE7": 3752*****,
        "longitudeE7": 13961*****,
        "name": "Wakaba Store",
        "placeId": "ChI********hBI",
        "startTime": "/Date(1589594150000)/"
      },
ファイル (WebDAV)
1つ1つの滞在先情報や移動情報は元データを分割した形でJSON形式のファイルとして保存されています。詳細ページはこのファイルをWebDAVコレクションのファイル取得APIを使って情報を取得、表示しています。
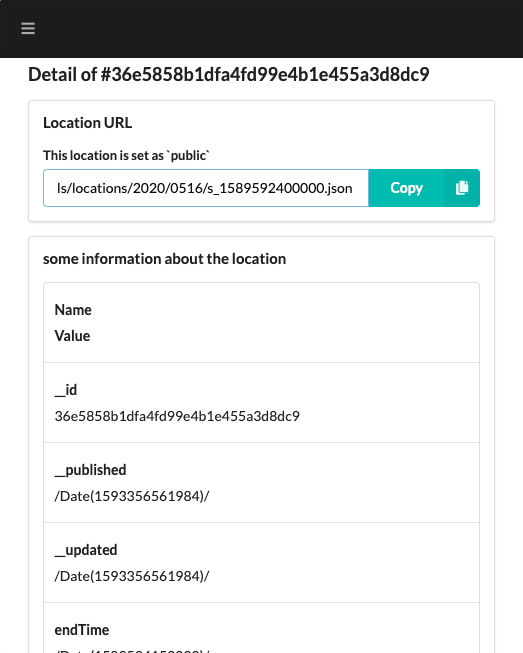
HTTP通信は以下のようになります。
# リクエスト
GET https://alice.example/app-personium-trails/locations/2020/0516/s_1589592400000.json

# レスポンス
Status Code: 200

(JSONファイルの内容)
データ共有
PersoniumではリソースのACL設定を行うことで、他者とのデータの共有が行えます。サンプルアプリでは移動履歴データの一部をトグルを押すことで、誰でも認証なしに参照できるように行えます。
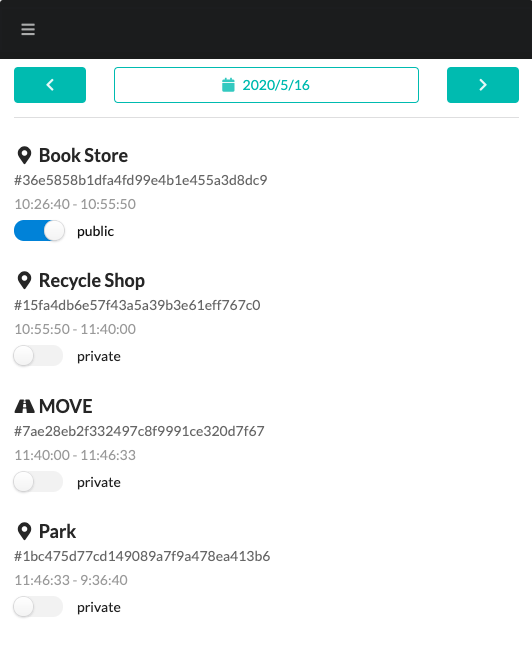
この時、Box Level アクセス制御設定APIを使っています。HTTP通信は以下のように行っています。
# リクエスト
ACL https://alice.example/app-personium-trails/locations/2020/0516/s_1589592400000.json

<?xml version="1.0" encoding="utf-8" ?>
<acl xmlns="DAV:" xmlns:p="urn:x-personium:xmlns">
    <ace xmlns="DAV:" xmlns:p="urn:x-personium:xmlns">
        <principal>
            <all/>
        </principal>
        <grant>
            <privilege>
                <read/>
            </privilege>
        </grant>
    </ace>
</acl>

# レスポンス
Status Code: 200
ACL設定はファイル設定取得APIによって確認できます。
# リクエスト
PROPFIND https://alice.example/app-personium-trails/locations/2020/0516/s_1589592400000.json

# レスポンス
Status Code: 207

<multistatus xmlns="DAV:">
    <response>
        <href>https://alice.example/app-personium-trails/locations/2020/0516/s_1589592400000.json</href>
        <propstat>
            <prop>
                <creationdate>2020-06-29T00:02:41.816+0900</creationdate>
                <getcontentlength>2623</getcontentlength>
                <getcontenttype>application/json</getcontenttype>
                <getlastmodified>Sun, 28 Jun 2020 15:02:41 GMT</getlastmodified>
                <resourcetype/>
                <acl xml:base="https://alice.example/__role/app-personium-trails/" xmlns:p="urn:x-personium:xmlns">
                    <ace>
                        <principal>
                            <all/>
                        </principal>
                        <grant>
                            <privilege>
                                <D:read xmlns:D="DAV:"/>
                            </privilege>
                        </grant>
                    </ace>
                </acl>
            </prop>
            <status>HTTP/1.1 200 OK</status>
        </propstat>
    </response>
</multistatus>
エンジンスクリプトはPersonium上で簡単なサーバサイドロジックを実行するものです。詳しくはPersonium Engineを参照してください。テンプレートアプリのpersonium-blank-appを使用するとOAuth 2.0 認可コードフローで使用するstart_oauth2.jsとreceive_redirect.jsの2つのエンジンスクリプトを使用できます。 ↩
